Today a lot of applications use microservice architecture, but what should we know and how we should test this type of software? In this article, we will consider basic theoretical concepts about CDC testing and testing tools that will be helpful.
Microservices architecture - is a collection of small services and each service responsible for certain functionality and can be written by using different programming languages, approaches, and solutions. One of the main goals of microservices-based application it's defining strong contracts between the various microservices.
Consumer-driven contract testing (CDC) - is a technique that allows us to test each application in isolation. After executing consumer tests we get generated pact files that will be used for getting verification results during executing provider tests. As a result, we will have artifacts that will be placed in Pact-broker.
Let's familiarize ourselves with the main concepts from the official sources.
Pact - is a code-first consumer-driven contract testing tool, and is generally used by developers and testers who code. In general, a contract is between a consumer (for example, a client that wants to receive some data) and a provider (for example, an API on a server that provides the data the client needs).
Pact Broker - is an application for sharing for consumer driven contracts and verification results. It is optimized for use with "pacts" (contracts created by the Pact framework), but can be used for any type of contract that can be serialized to JSON. The Pact Broker is an open source tool that requires you to deploy, administer and host it yourself but also they provide plug-and-play option at pactflow.io.
Mocha - is a feature-rich JavaScript test framework running on Node.js and in the browser, making asynchronous testing simple and fun. Mocha lets you to use any assertion library.
Chai - is a BDD / TDD assertion library for node and the browser that can be delightfully paired with any javascript testing framework.
Axios - promise based HTTP client for the browser and node.js.
Simple example of CDC testing
Here is a code snippet from package.json where you can see all packages that will be used.
{
"@pact-foundation/pact": "^9.9.3",
"axios": "^0.19.0",
"chai": "^3.5.0",
"mocha": "^5.1.1"
}
Step 1. Consumer tests
There are two different specs that will be describing TODO API - "JSONPlaceholder" and USER API - "REQ | RES" . The first example you can see below. Second spec the same except the request and response objects.
todoClient.js
const getUserById = (id, baseURL) => {
  return axios.request({
    method: 'GET',
    baseURL,
    url: `/users/${id}`,
    headers: { Accept: 'application/json' },
  })
}
todo.spec.js
describe('The Todo API', () => {
  const mockServerURL = 'http://localhost:1234'

  // Create the Pact object to represent your provider
  const provider = new Pact({
    port: 1234,
    log: path.resolve(process.cwd(), 'logs', 'mockserver-integration.log'),
    dir: path.resolve(process.cwd(), 'pacts'),
    consumer: 'Consumer',
    provider: 'Todo Provider',
    spec: 2,
    logLevel: 'error',
    pactfileWriteMode: 'merge',
  })

  // this is the response you expect from your Provider
  const EXPECTED_BODY = {
    userId: 1,
    id: 1,
    title: 'delectus aut autem',
    completed: false,
  }

  // Start the mock server
  before(() => provider.setup())

  // Write Pact when all tests done
  after(() => provider.finalize())

  // verify with Pact, and reset expectations
  afterEach(() => provider.verify())

  describe('Get todo by id', () => {
    before(async () => {
      const interaction = {
        state: 'Get todo',
        uponReceiving: 'A request for one todo',
        withRequest: {
          method: 'GET',
          path: '/todos/1',
          headers: {
            Accept: 'application/json',
          },
        },
        willRespondWith: {
          status: 200,
          headers: {
            'Content-Type': 'application/json; charset=utf-8',
          },
          body: EXPECTED_BODY,
        },
      }
      // add interactions to the Mock Server
      await provider.addInteraction(interaction)
    })

    it('GET /todos/1', async () => {
      let { data } = await getTodoById(1, mockServerURL)
      expect(data).to.eql(EXPECTED_BODY)
    })
  })
})
After running tests we will receive the following pact files: consumer-user_provider.json consumer-todo_provider.json:
{
 "consumer": {
   "name": "Consumer"
 },
 "provider": {
   "name": "Todo Provider"
 },
 "interactions": [
   {
     "description": "A request for one todo",
     "providerState": "Get todo",
     "request": {
       "method": "GET",
       "path": "/todos/1",
       "headers": {
         "Accept": "application/json"
       }
     },
     "response": {
       "status": 200,
       "headers": {
         "Content-Type": "application/json; charset=utf-8"
       },
       "body": {
         "userId": 1,
         "id": 1,
         "title": "delectus aut autem",
         "completed": false
       }
     }
   }
 ],
 "metadata": {
   "pactSpecification": {
     "version": "2.0.0"
   }
 }
}
Step 2. Publishing pact files. In this example we will use pactflow.io (Developer FREE plan)
publish.pacts.js
const gitHash = require('child_process')
  .execSync('git rev-parse --short HEAD')
  .toString()
  .trim()

const opts = {
  pactFilesOrDirs: ['./pacts/'],
  pactBroker: 'https://yourCompanyName.pact.dius.com.au',
  pactBrokerToken: 'yourPactBrokerToken',
  tags: ['prod', 'test'],
  consumerVersion: gitHash,
}

pact
  .publishPacts(opts)
  .then(() => {
    console.log('Pact contract publishing complete!')
  })
  .catch((e) => {
    console.log('Pact contract publishing failed: ', e)
  })
For getting pactBrokerToken you need to proceed to /settings/api-tokens and copy Read/write token (CI)

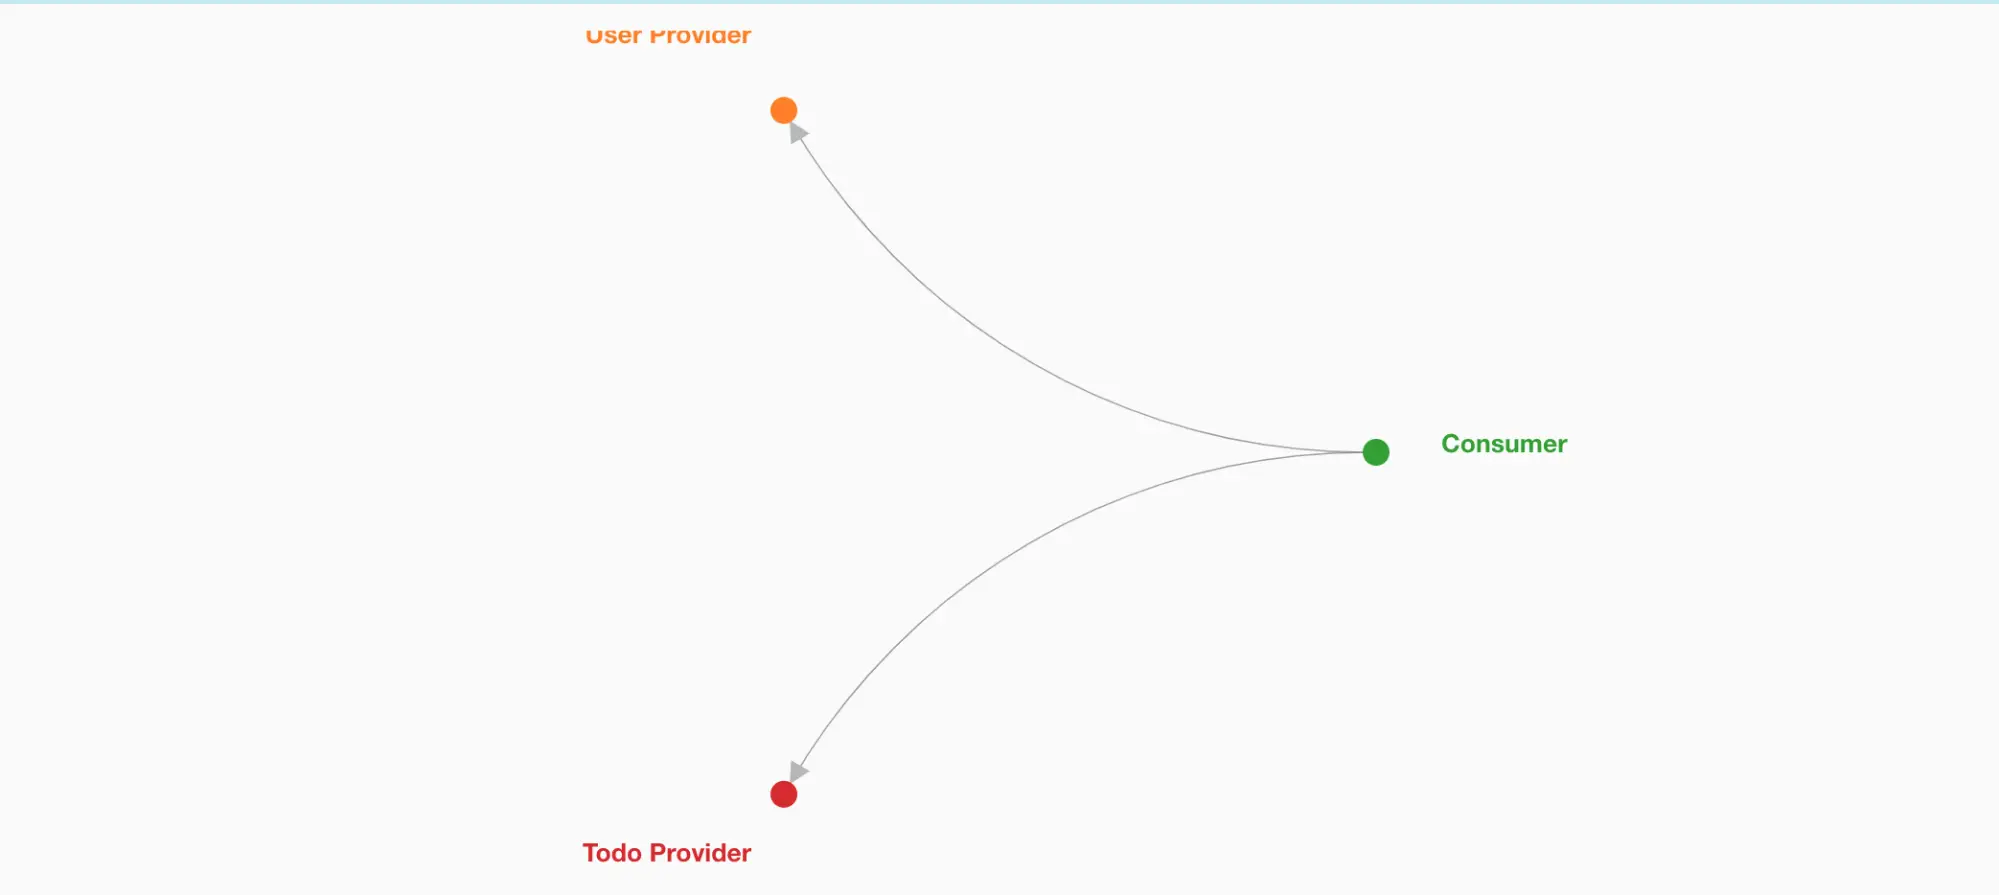
After running this script we will receive the following results:


Step 3. Pacts Verification
provider.spec.js
const opts = {
  logLevel: 'INFO',
  providerVersion: '1.0.0',
  pactBrokerUrl: 'https://yourCompanyName.pact.dius.com.au',
  pactBrokerToken: 'yourPactBrokerToken',
  publishVerificationResult: true,
}

describe('Pacts Verification', () => {
  it('Validates the expectations of Todo provider', () => {
    return new Verifier({
      ...opts,
      provider: 'Todo Provider',
      providerBaseUrl: 'https://jsonplaceholder.typicode.com',
    }).verifyProvider()
  })

  it('Validates the expectations of User provider ', () => {
    return new Verifier({
      ...opts,
      provider: 'User Provider',
      providerBaseUrl: 'https://reqres.in/api',
    }).verifyProvider()
  })
})
After running tests we will receive the following results:


Previous object:
const EXPECTED_BODY = {
  userId: 1,
  id: 1,
  title: 'delectus aut autem',
  completed: false,
}
New object:
const EXPECTED_BODY = {
  userId: 1,
  id: 1,
  title: 'Our new title that will trigger the error',
  completed: false,
}
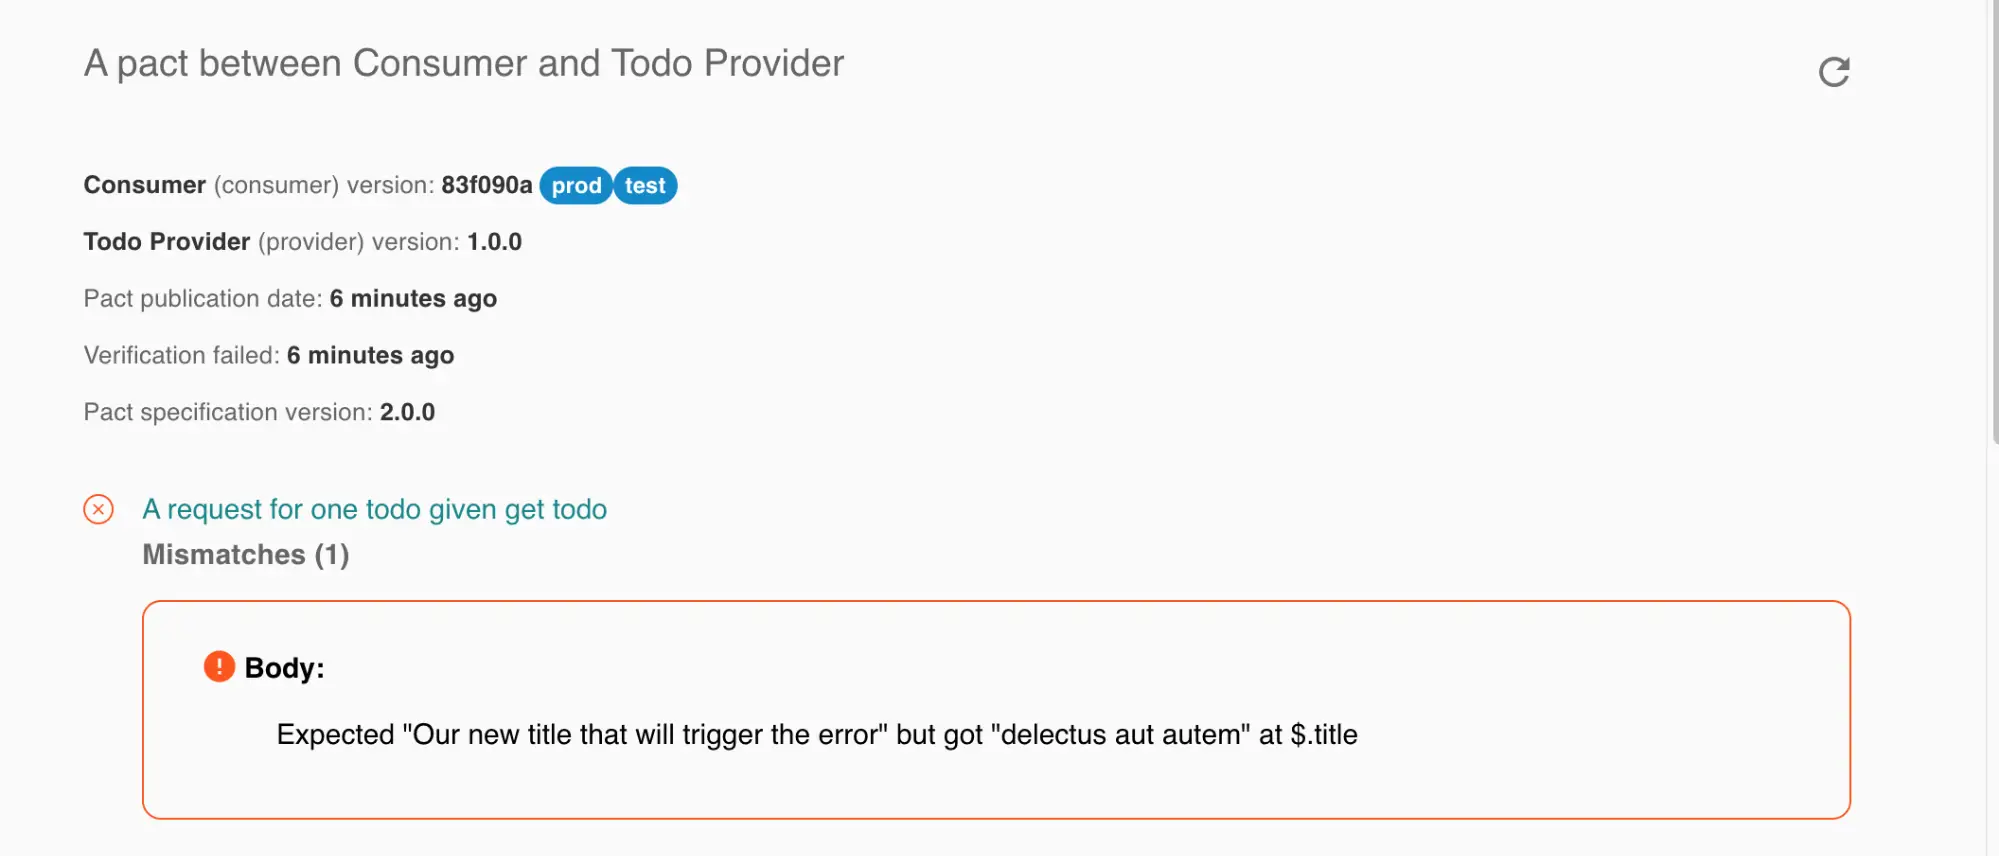
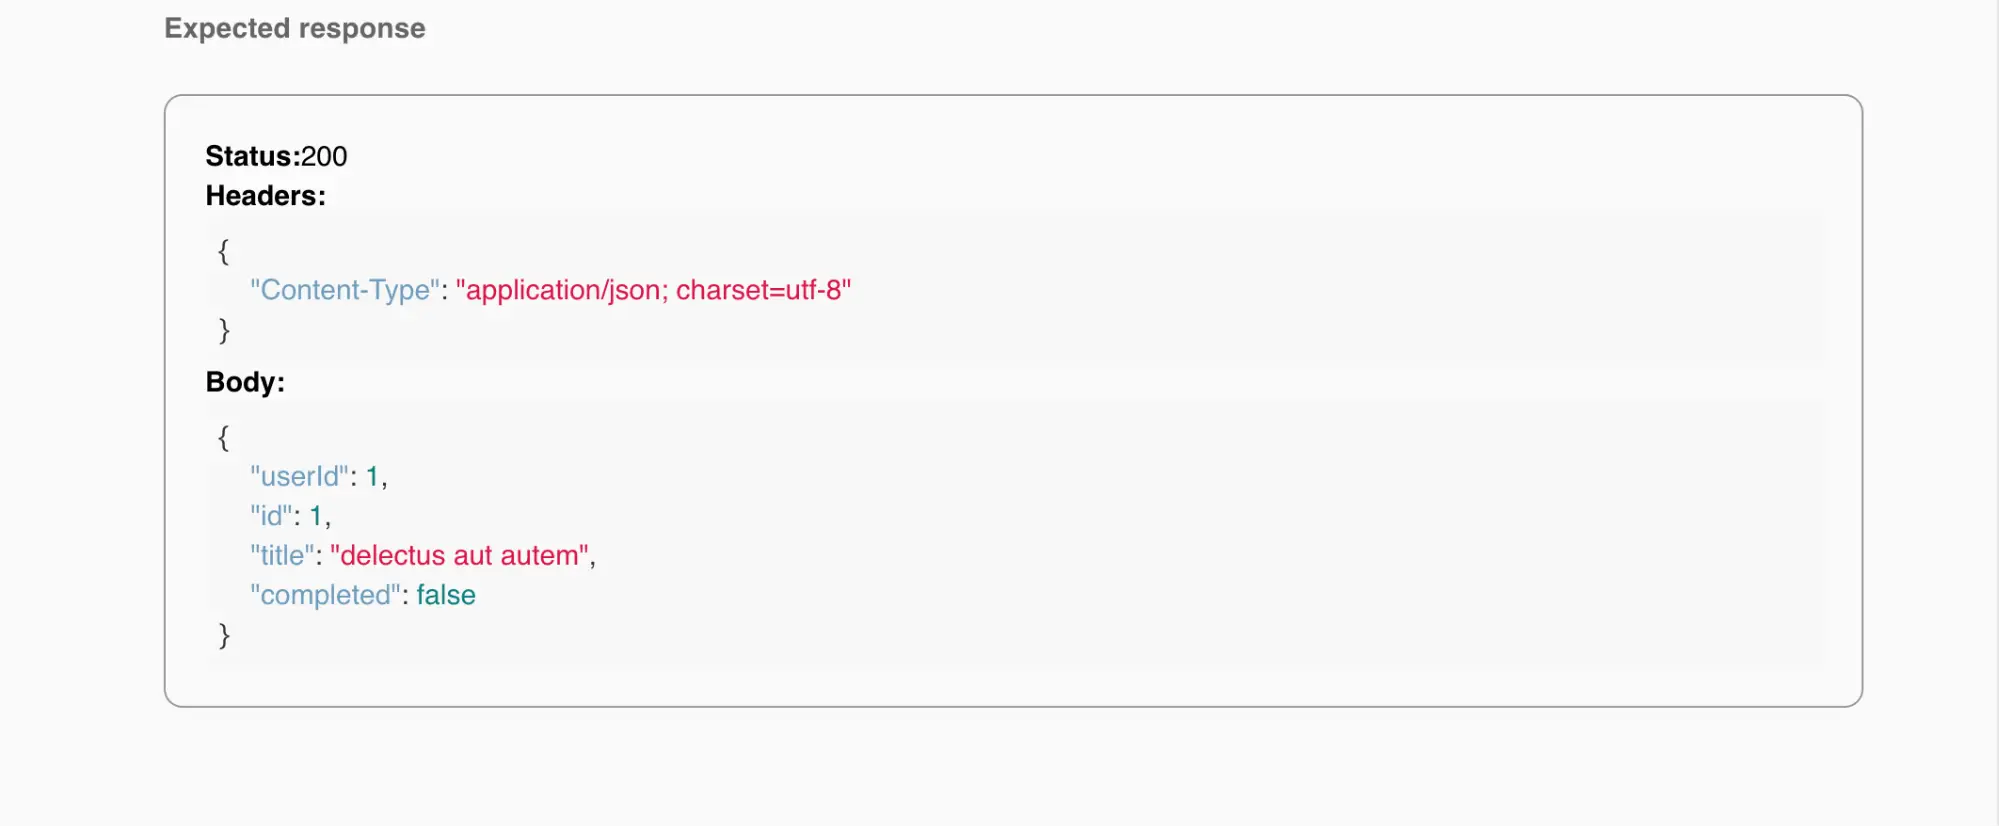
Result after running tests:

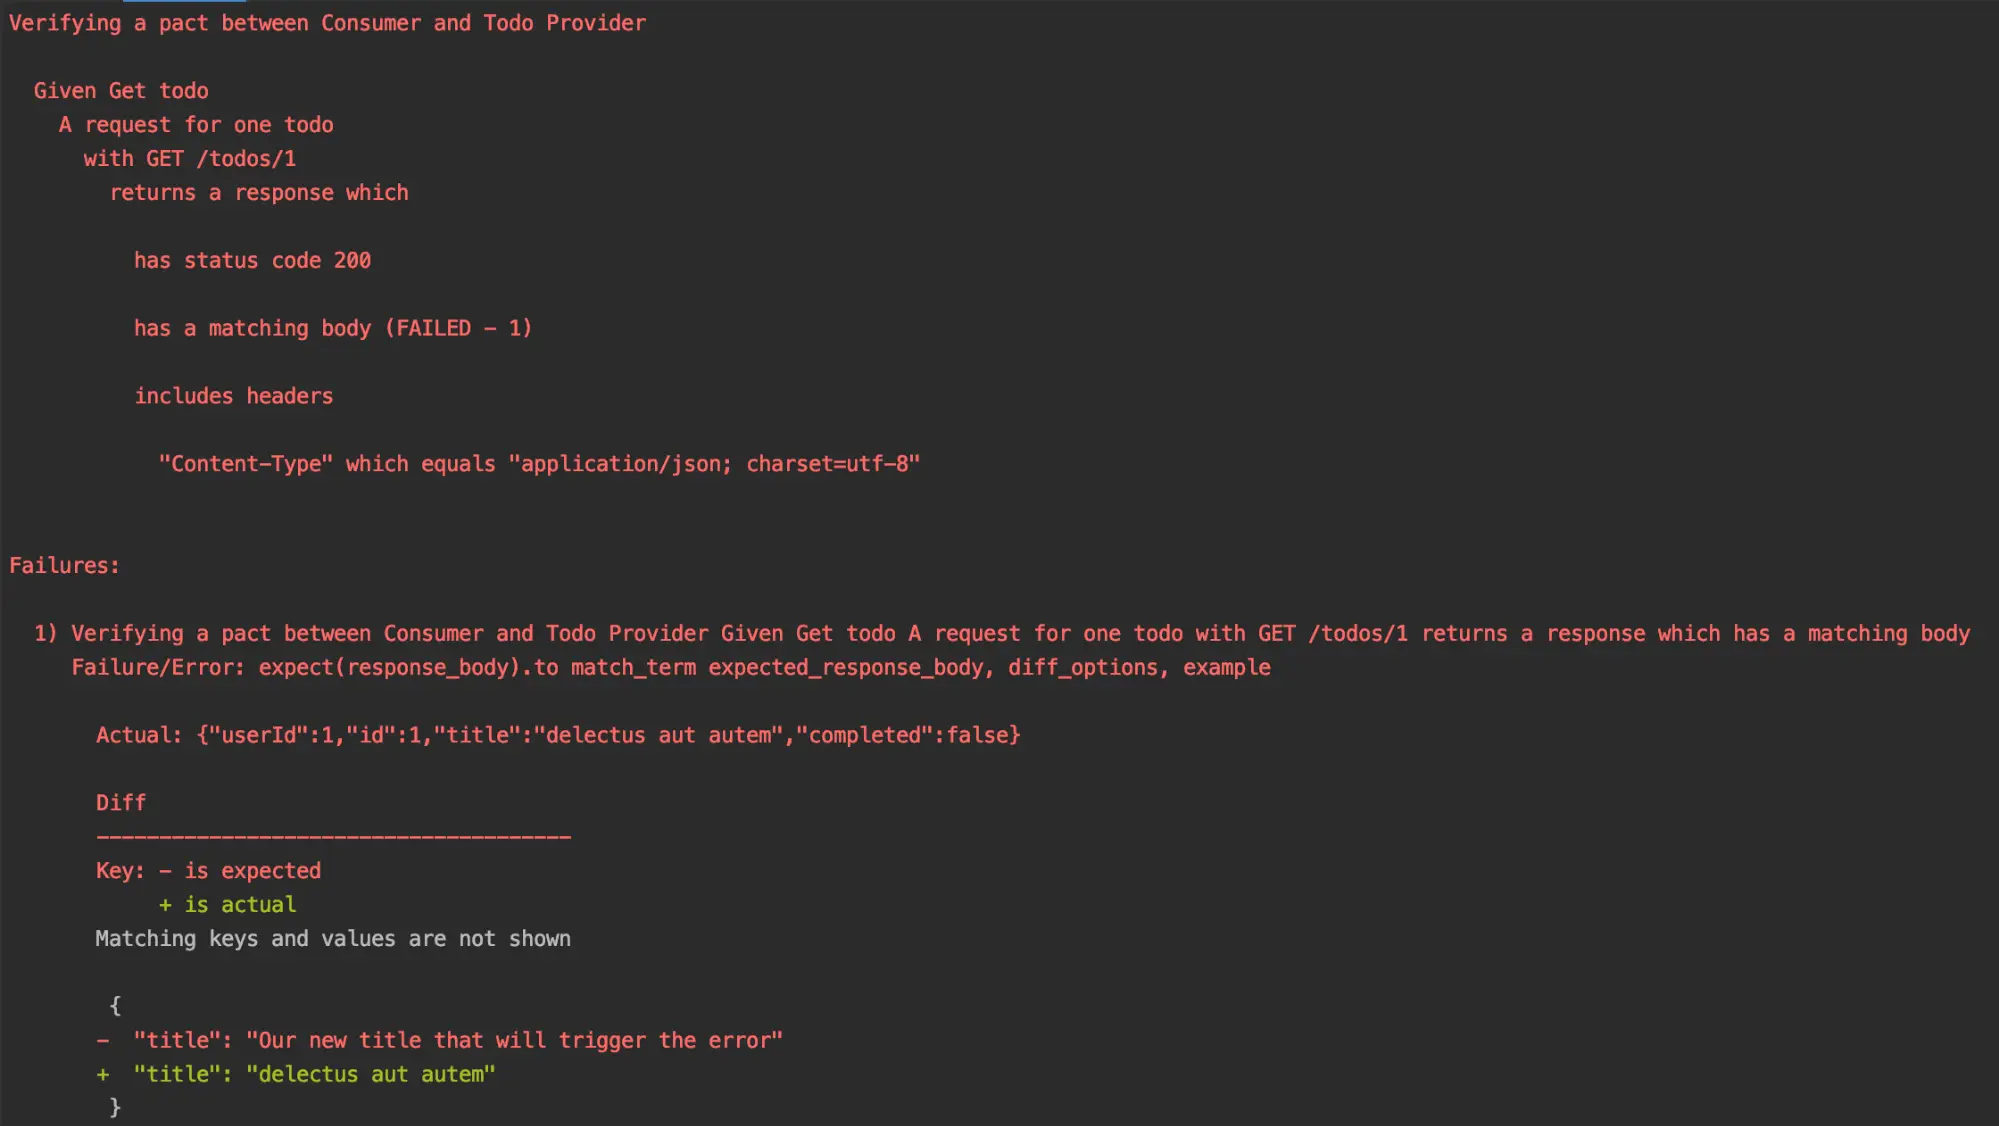
Console output:

Conclusions
Testing microservices it's a very difficult process that requires a good knowledge of different testing tools for achieving needed goals. In this article, we considered basic concepts and simple example of writing CDC tests using Pact. You can deeply familiarize yourself with this powerful testing tool on the official site and use all provided features for testing your microservices.
