What is TestNG?
TestNG is a framework for testing which come to correct deficiencies of another well-known testing JUnit framework. The "NG" indicates "Next Generation". A majority of Selenium users use it of its advantages over JUnit. There are a lot of various features of TestNG, but we will consider only the major ones.
Advantages of TestNG over JUnit
Let's learn TestNG advantages over JUnit:
Annotations are easier to understand
More easily grouping of test cases
Testing in parallel threads
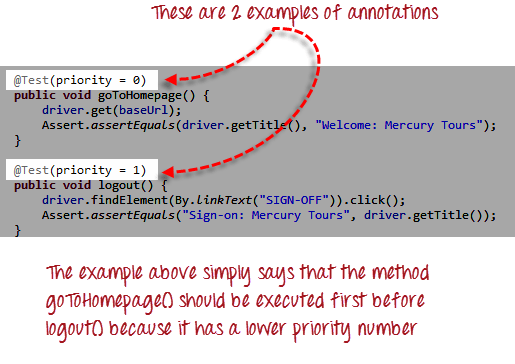
Annotations in TestNG represent code lines that can manage how the method below them will be executed. The @ symbol is always set before annotation. Small examples are shown below.
Why is necessary to use TestNG in Selenium?
Test reports can be generated in a convenient format for reading, which are based on test results of Selenium.
WebDriver, unfortunately, does not have a built-in report generation function.
For instance:
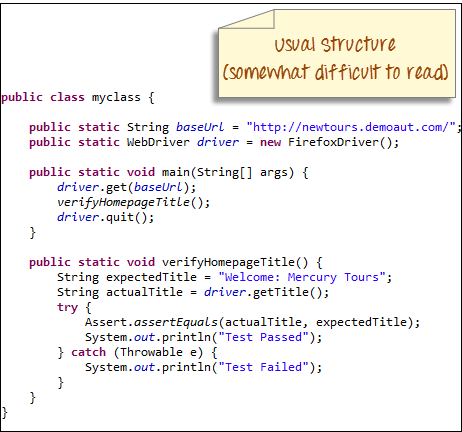
TestNG makes easier testing.
The main method is no longer necessary. Priority of tests regulates by annotations for which is optionally methods were static.
TestNG automatically catches the uncaught exceptions without fully executing a test. These exceptions are written as failed steps in the test report.
Writing an example of a test case
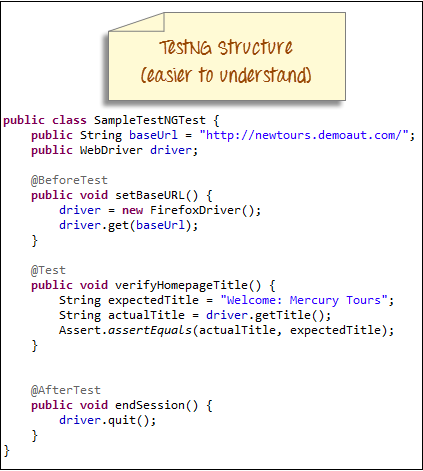
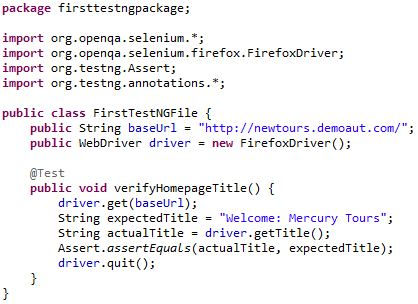
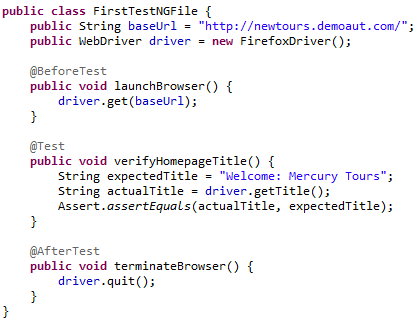
Let us write a simple test that checks if Mercury Tours' homepage is expected.
Take a look at the some things:
A main() method is not required if you use TestNG
Using static methods is not necessarily
* The @Test annotation was used. @Test is used to identify that the method under it is the test. In this instance, the verifyHomepageTitle() method is a test method.
For using TestNG annotations in Selenium, it is necessary to import the package org.testng.annotations.*.
The Assert class was used. The Assert class is designed to perform operations of verification in TestNG. For using it, it is * necessary to import the org.testng.Assert package.
You can have several test cases (that's why, several @Test annotations) in a one TestNG file.
Running the Test
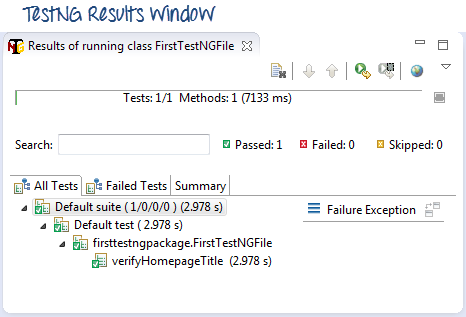
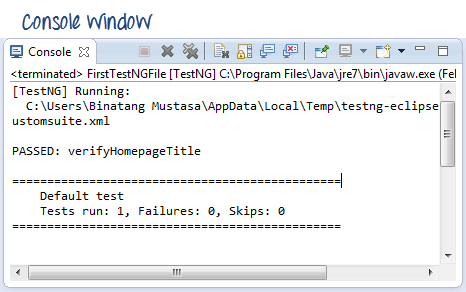
For executing the test, you need to just run the file in Eclipse. Two outputs will be provided - Console and TestNG Results window.
TestNG Annotations
Now review some popular annotations more in details.
Parameters
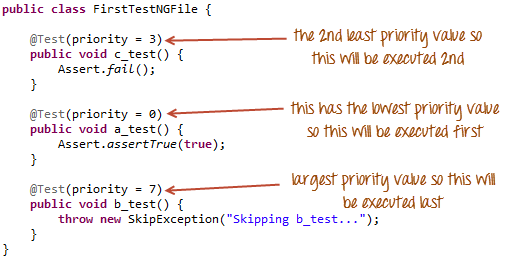
To run the methods in desired sequence, it is necessary to use the "priority" parameter.
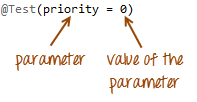
A value must be set to the each parameter. It is placed after "=".
The parameters are in parentheses and placed immediately after the annotation. Example:
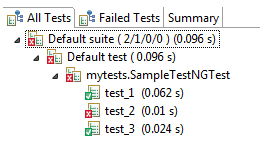
The picture below shows the sequence in which the methods will execute.
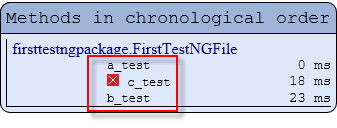
The sequence of executing methods will be shown in the test report.
Besides the priority, abstract test has one the boolean parameter "alwaysRun". When multiple parameters, they are separated by a comma.
@BeforeTest and @AfterTest
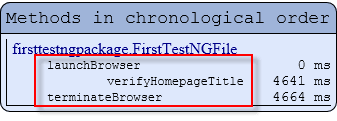
Let's look at the selenium examples below.
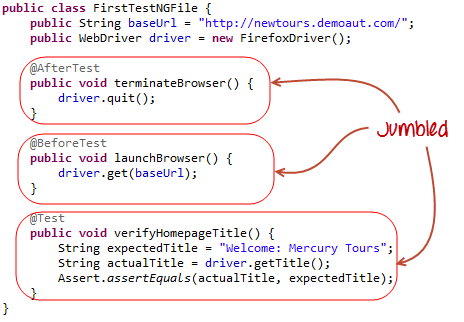
Based on the logic and the above example, we can assume in what order the methods will be executed:
2nd - verifyHomepageTitle()
The sequence of annotations can be changed without breaking the chronological order of execution the methods.
Execute the code above and see the such result:
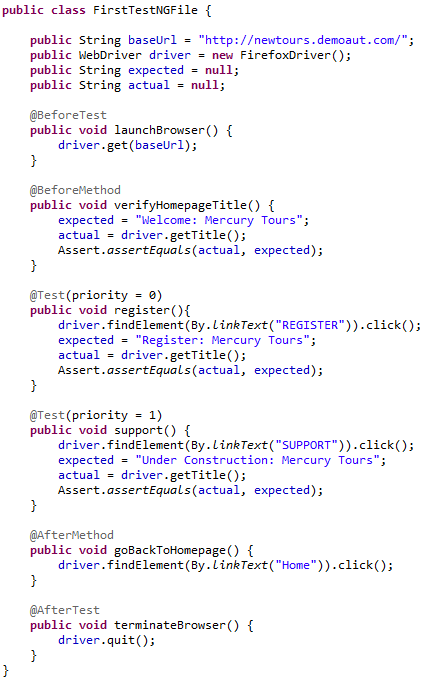
In the example below, we will verify the presence of two links in Mercury Tours.
The order of execution of the action will be the such:
Open the homepage and check its title.
Click "REGISTER" link and check the title of its page.
Return to the homepage and check if the title is still correct.
Click "SUPPORT" link and check the title of its page.
Return to the homepage and check if the title is still correct.
The code below shows how **@BeforeMethod
@AfterMethod** are used to efficiently run the scenario mentioned before.
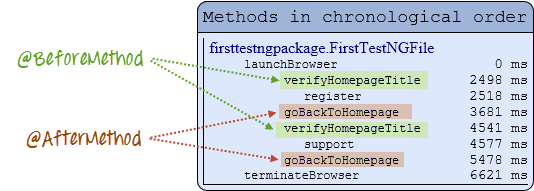
The test report should be generated by TestNG with the following sequence:
Summarize, **@BeforeMethod** should hold the methods that are needed to execute
every test while **@AfterMethod** should hold the methods that are needed to run
Summary of TestNG Annotations
TestNG is more flexible because of its annotations. What do they offer to us?
So there are controlled annotation TestNG:
1.
Annotations **@BeforeSuite**, **@AfterSuite** Indicate the methods that are executed once before / after execution of all tests. It is convenient to have any difficult settings common to all tests, for example, you can create a pool of database connections.
2.
Annotations **@BeforeGroups**, **@AfterGroups** refer to methods that run before / after the first / last test belonging to a given group.
3.
Annotations **@BeforeClass**, **@AfterClass** define the methods that are executed once before / after execution of all tests in the class. The most suitable for testing of a specific service, which does not change its status as a result of the test.
4.
Annotations **@BeforeTest**, **@AfterTest** define methods that are executed once before / after the execution of the test (the one that includes the test classes, not to be confused with the test methods). Here you can store the settings of a group of interrelated services or a service if it is tested by several test classes.
5.
Methods with **@BeforeMethod**, **@AfterMethod** annotations will be executed before/after each test method.
All of these annotations have the following options:
enabled - can be temporarily disabled by setting the value to false
groups - define, for which groups will be executed
inheritGroups - if true (and the default value is true), the method will inherit the group of the test class
timeOut - the time after which "fall down" method and drags along all dependent tests from its description - the name used in the report
dependsOnMethods - methods from which they are depended, will first be executed, and then this method
dependsOnGroups - the groups from which they are depended
alwaysRun - if set to true, will always be called regardless of which groups it belongs to, not applicable to **@BeforeGroups**, **@AfterGroups**.


